Blog
Binder for Wedding Planning: Six Sections to Set Up
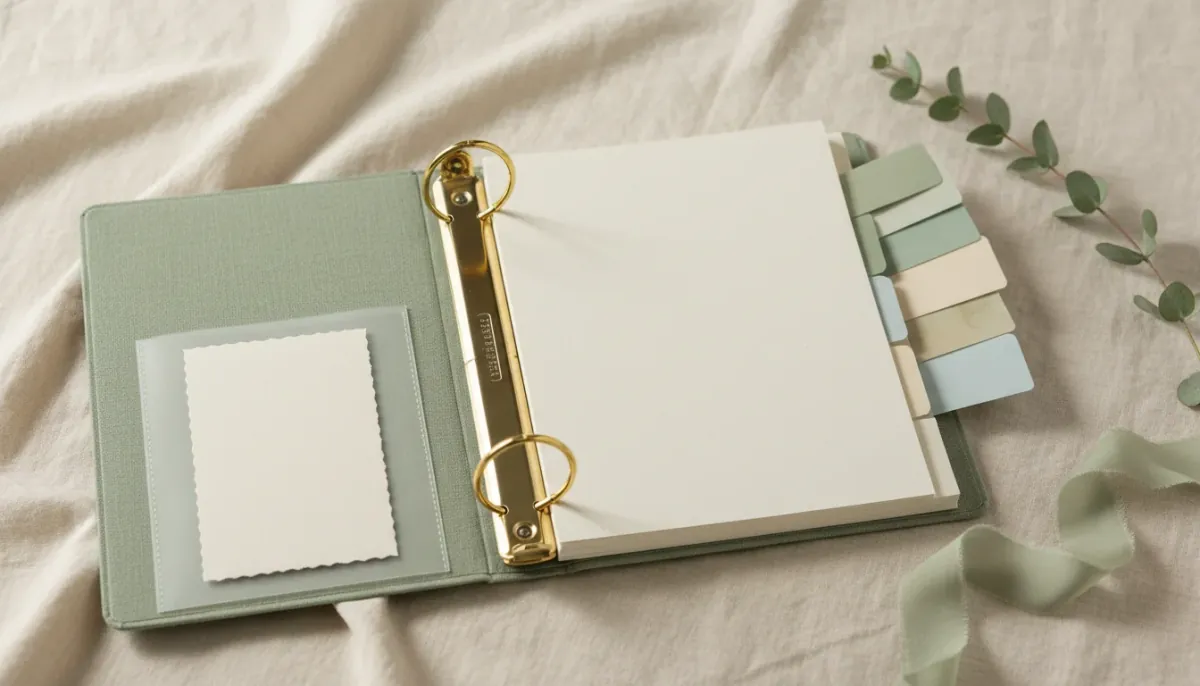
Wedding papers pile up fast, and the signed contract you need is never where you left it. A binder for wedding planning keeps every paper behind six tabs (details, budget, guests, vendors, timeline and day-of), so you, your partner and anyone helping can find the right page.
Six tabs cover a whole wedding. Details holds the facts every vendor asks for. Budget, guests and vendors hold printed summaries and signed papers. Timeline holds the plan for the day. Day-of is the packet you lift out and hand to your coordinator the week before. Everything that changes daily stays in a spreadsheet, and you print a dated copy when you need it.
| Step | What to do | What to watch for |
|---|---|---|
| 1 | Get a ring binder, six tabs and a cover page | An inside pocket for receipts you can't punch |
| 2 | Label six tabs in the order you will use them | More than six tabs and pages get lost |
| 3 | Fill details, budget and guests | Print summaries, not every row |
| 4 | File vendor pages, contracts and the timeline | One page per vendor, contract behind it |
| 5 | Decide what stays digital | Date every printed page |
| 6 | Pull out the day-of packet | Each page names who it is for |
Step 1: Choose a binder, tabs and a cover page
Any three-ring binder works. Pick one with a clear sleeve on the front and a pocket inside the cover. The pocket takes receipts, swatches and business cards you can't punch. Add six divider tabs and a pack of sheet protectors for anything you must not punch, like a signed contract.
The cover page tells anyone who picks up the binder whose it is. Put your two names, the wedding date and one phone number on it. Slide it into the front sleeve. If the binder gets left at a venue or a tasting, whoever finds it can call you.
Start the binder early. The Emily Post Institute's one to two year planning list puts "Create a filing/organizational system for wedding paperwork" right next to setting the date and the budget. The first deposit receipt needs a home on the day you pay it.
Step 2: Set up six tabs in your binder for wedding planning
Six tabs are enough for most weddings. Label them in the order you'll use them during planning, so the front of the binder is always the part you open most.
- Details. The facts you repeat to everyone.
- Budget. What you planned, what you paid and what is left.
- Guests. The guest list, the reply count and the table plan.
- Vendors. One page per vendor, with the contract behind it.
- Timeline. The plan for the day, minute by minute.
- Day-of. The pages other people carry on the day.
Ideas, inspiration and a long to-do list don't need their own tab. Photos live better on your phone. Your task list lives better in a checklist that tells you what is due. The guide to the checklist for planning a wedding has every task with its month.
Step 3: Fill the details, budget and guest sections
The details tab is one page. Write the ceremony and reception venues with addresses and times, the officiant, the coordinator, your wedding website, the guest count goal and the reply-by date. Add the wedding party with a phone number for each person. Every vendor asks for the same facts, and this page has them all.
The budget tab holds a one-page summary. The math stays in your spreadsheet. Print one page that shows each category with planned, paid and still to pay. Behind it, file every receipt in date order. Each time a number changes, update your spreadsheet and print a new summary. For how much to spend and how to split it, see the guide to your wedding budget.
The guest tab starts with the list itself. The Emily Post Institute's 9 to 12 month planning list says to create a master guest list with the names, addresses, phone numbers and email addresses of every guest. The same list tells you to create a gift record as gifts arrive. Give the gift record its own page at the back of this tab, with a column to tick when the thank-you note is sent.
Step 4: File vendor pages, contracts and the timeline
Give each vendor one page in booking order. Write the business name, the person you deal with, a phone number that works on the wedding day, what the contract covers, what you have paid and when the rest is due. Slip the signed contract into a sheet protector right behind that page. If a florist or a DJ calls with a question, you can answer with the contract in your hand.
What to book first, deposits and tips belong in the wedding vendor checklist. The binder only needs to hold the result, so one page per booked vendor is enough.
The timeline tab holds the run of the day: when each part starts, where it happens and who is involved. Add a second page with each vendor's arrival and departure times. Both change often in the last month, so print them late and date them. A free wedding day timeline template gives you the layout if you have none yet.
Step 5: Decide what stays digital and what goes on paper
A binder is good at holding things and bad at math. Anything you add up, sort or change every week belongs in a spreadsheet. Anything you sign, hand over or need without a phone belongs on paper. The split below works for most couples.
| What | Keep it on paper | Keep it digital | Why |
|---|---|---|---|
| Signed contracts and receipts | Yes, in sheet protectors | A photo as backup | You want the signed copy at hand if a question comes up |
| Budget | One dated summary page | The full sheet | Totals change with every payment |
| Guest list and replies | Final list and table plan | Every update while replies come in | The list changes with every reply |
| Vendor contacts | One page per vendor | Phone contacts | Phones die on the wedding day |
| Timeline | Final version, printed the week before | Every draft | Only the last version counts |
| Inspiration photos | No | Yes | Pages of photos make the binder too thick to use |
| Certified marriage certificate copies | Yes, in the back pocket | No | Agencies want certified copies |
Certified copies of your marriage certificate matter after the wedding. USAGov's guide to changing your name says to use certified copies of key documents, such as marriage certificates, as proof when you notify agencies. Keep those copies in the back pocket of the binder so they are all in one place.
Our wedding planning bundle is built for this split. You get spreadsheets for Excel or Google Sheets for the budget, vendor payments, guest list and RSVPs, the planning checklist and a planner workbook. Each one comes with printable pages in Letter and A4 sizes, so you work in the sheet and print the page for the binder. The planner workbook's pages are a cover, wedding details, budget overview, guest list, vendor contacts, to-do, a month at a glance and notes. Print them on plain paper at Actual size (100%).
A wedding binder is only as useful as the newest page in it.
Step 6: Pull out a day-of packet for your coordinator
The day-of tab is the part other people carry. Fill it the week before and lift it out of the binder on the last evening. Put a name on top of each page, so everyone knows which page is theirs.
| Page | Who gets it |
|---|---|
| Timeline and vendor arrival times | Your coordinator or point person |
| Vendor contacts and the envelope list (balances and tips) | Your coordinator or point person |
| Special ceremony seating | Ushers |
| Must-have photos and family groups | Photographer |
| Call times and jobs for the day | Wedding party |
The Emily Post Institute's list for the final weeks includes a list of special ceremony seating to give to ushers and a list of must-have photos to give to the photographer. Both belong in this tab. What to pack for the day and who carries the emergency kit is a separate list, covered in the wedding day checklist.
Our wedding planning bundle also covers the day-of tab. It includes a day-of timeline with a wedding-party itinerary and vendor arrivals, a photo shot list with 33 shots and 10 family groups filled in, a day-of checklist with 44 items in six sections and a vendor contact list with envelopes and payments.
When a printed binder is the wrong choice
A paper binder suits you if you like to hold your plan and flip to a page. It's the wrong tool if you plan entirely on your phone and want reminders. Our bundle has no app and sends no reminders. It is spreadsheets and printable pages. The bundle also has no binder, rings or tabs. You buy those at any office supply store.
If you're having a very small wedding with one venue and a handful of vendors, one folder with the contracts may be all you need. In that case our wedding planning bundle is more than you need, and the free timeline template plus a folder will do.
Frequently asked questions
How to organize a wedding binder?
Use six tabs in this order: details, budget, guests, vendors, timeline and day-of. Put the fact sheet at the front, a printed summary at the front of each money and guest tab, and signed contracts behind the vendor tab in the order you booked them. Keep the day-of tab last so you can lift it out the week before.
What goes in a wedding planning binder?
The papers you need to hold or hand over. That means a one-page fact sheet, a budget summary, the guest list and table plan, one page per vendor with the signed contract behind it, the timeline for the day, and the pages your coordinator, ushers and photographer need. Inspiration photos and running lists stay on your computer or phone.
Can I make a DIY wedding binder?
Yes. A three-ring binder, six divider tabs, a hole punch and a few sheet protectors are all it takes. Print your pages on plain paper at Actual size (100%), punch them and file them behind the right tab. Keep the numbers in a spreadsheet and print a fresh summary when they change.
Conclusion
Set up six tabs and give each one a job. Details holds the facts you repeat to every vendor. Budget, guests and vendors hold printed summaries of spreadsheets that live on your computer, plus every signed contract and receipt. Timeline holds the plan for the day, and the day-of tab comes out the week before and goes to your coordinator. Date every print, keep one master file, so the newest page is always the right one.